Connect with customers using Facebook Messenger

Say hello to easy customer engagement through Facebook Messenger – a powerful tool that lets you build strong connections with your customers.
And guess what? With Chative.IO, you can handle all your business chats right inside the Chative.IO Inbox, even if you're managing multiple Facebook pages.
Are you excited to get started? With just a few simple steps, you'll be all set to make these great things happen.
Connect Chative.IO with Facebook
The integration process takes just a few minutes. Log in to Chative.IO app and follow these simple steps:
Step 1: Navigate to Channels on the sidebar, and create a new Facebook Messenger channel.
Step 2: Go to the Facebook Page tab and click Connect.
Step 3: Enter your Facebook credentials and hit Log in.
Step 4: Next, please tap Continue as [your Facebook account name] and pick the pages you want to link up with Chative.IO, then hit Continue.
Step 5: Make sure to give us full permission to access your pages and click on Save.
Step 6: Select a Facebook page from the list you got in Step 4 to connect Chative.IO.
If you need to change your list of Facebook pages or add a new one, just disconnect the current Facebook page and click Refresh.
Now, if you see the Facebook Page settings tab popping up, you're in the right place. Start fresh from Step 4, but this time choose Edit Settings instead of Continue as [your Facebook account name]. Let's keep the setup going!
You can link only one channel to a single Facebook Page. To include more than one Facebook page, simply create a new channel for each additional page.
Disconnect Facebook
If you ever want to disconnect the live chat from your Facebook page or switch to a different page, just click on the Disconnect button right next to the page that's currently linked in the Facebook Page section.

And there you have it! You're now familiar with all the setup steps for your Facebook page in our system. Exciting, right? But wait, there's more!
Let's take the next exciting leap and discover how to install live chat directly to your website. This way, you'll be all set to start receiving and responding to messages from your valued customers right within the Chative.IO.
FAQs
Why am I not receiving messages from Facebook?
The issue is often caused by the account losing Chative's access from Facebook's Business Integration.
How to fix:
Go to Chative > Connected Channels > Reconnect with Facebook.
Why can’t I send messages via Messenger?
Common reasons include:
Permissions for organization members to reply to customers are not set.
Chative's permissions in Facebook's settings have been revoked.
Forgotten login password for the Facebook page.
How to fix:
Method 1:
- Go to your Facebook page > Settings and Privacy > Settings > Page Setup > Advanced Messaging.
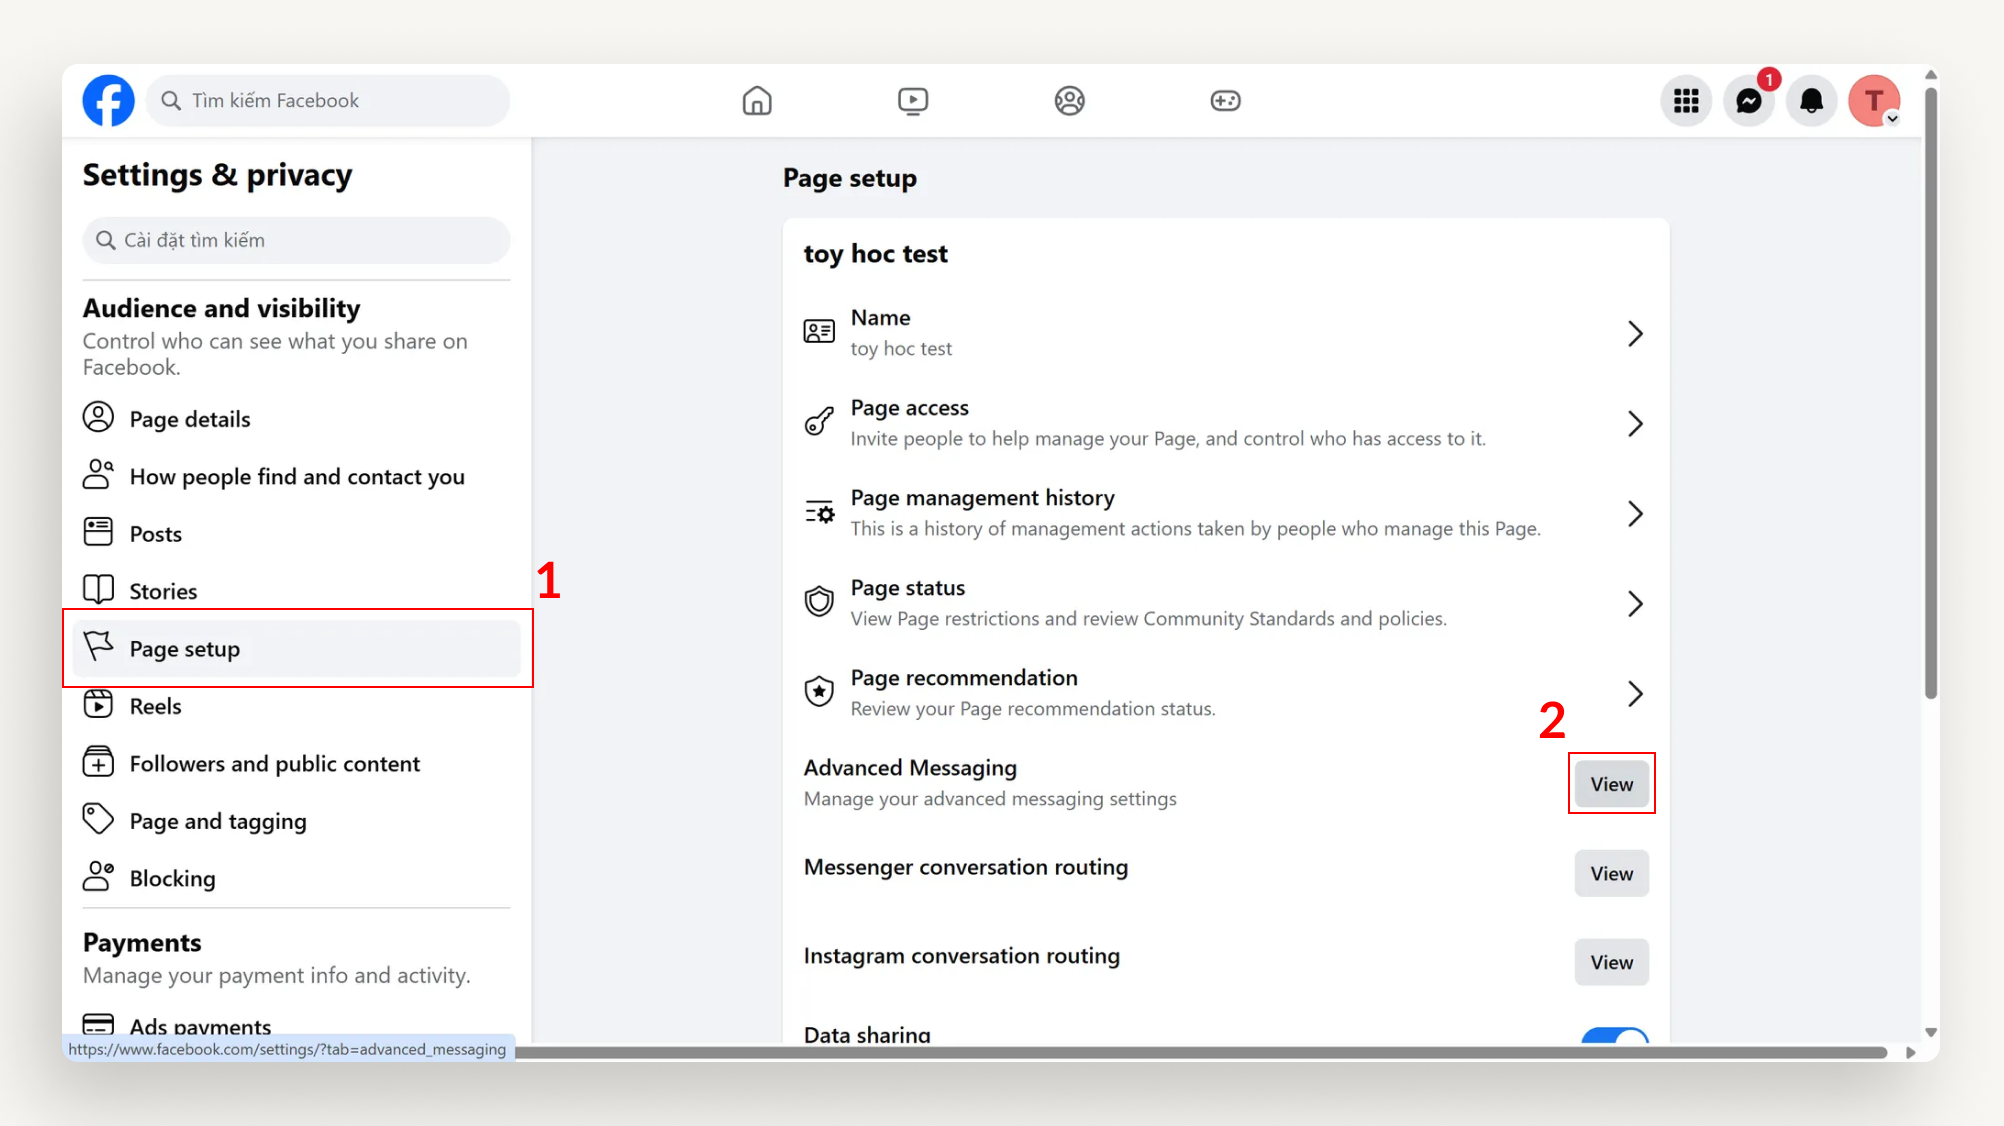
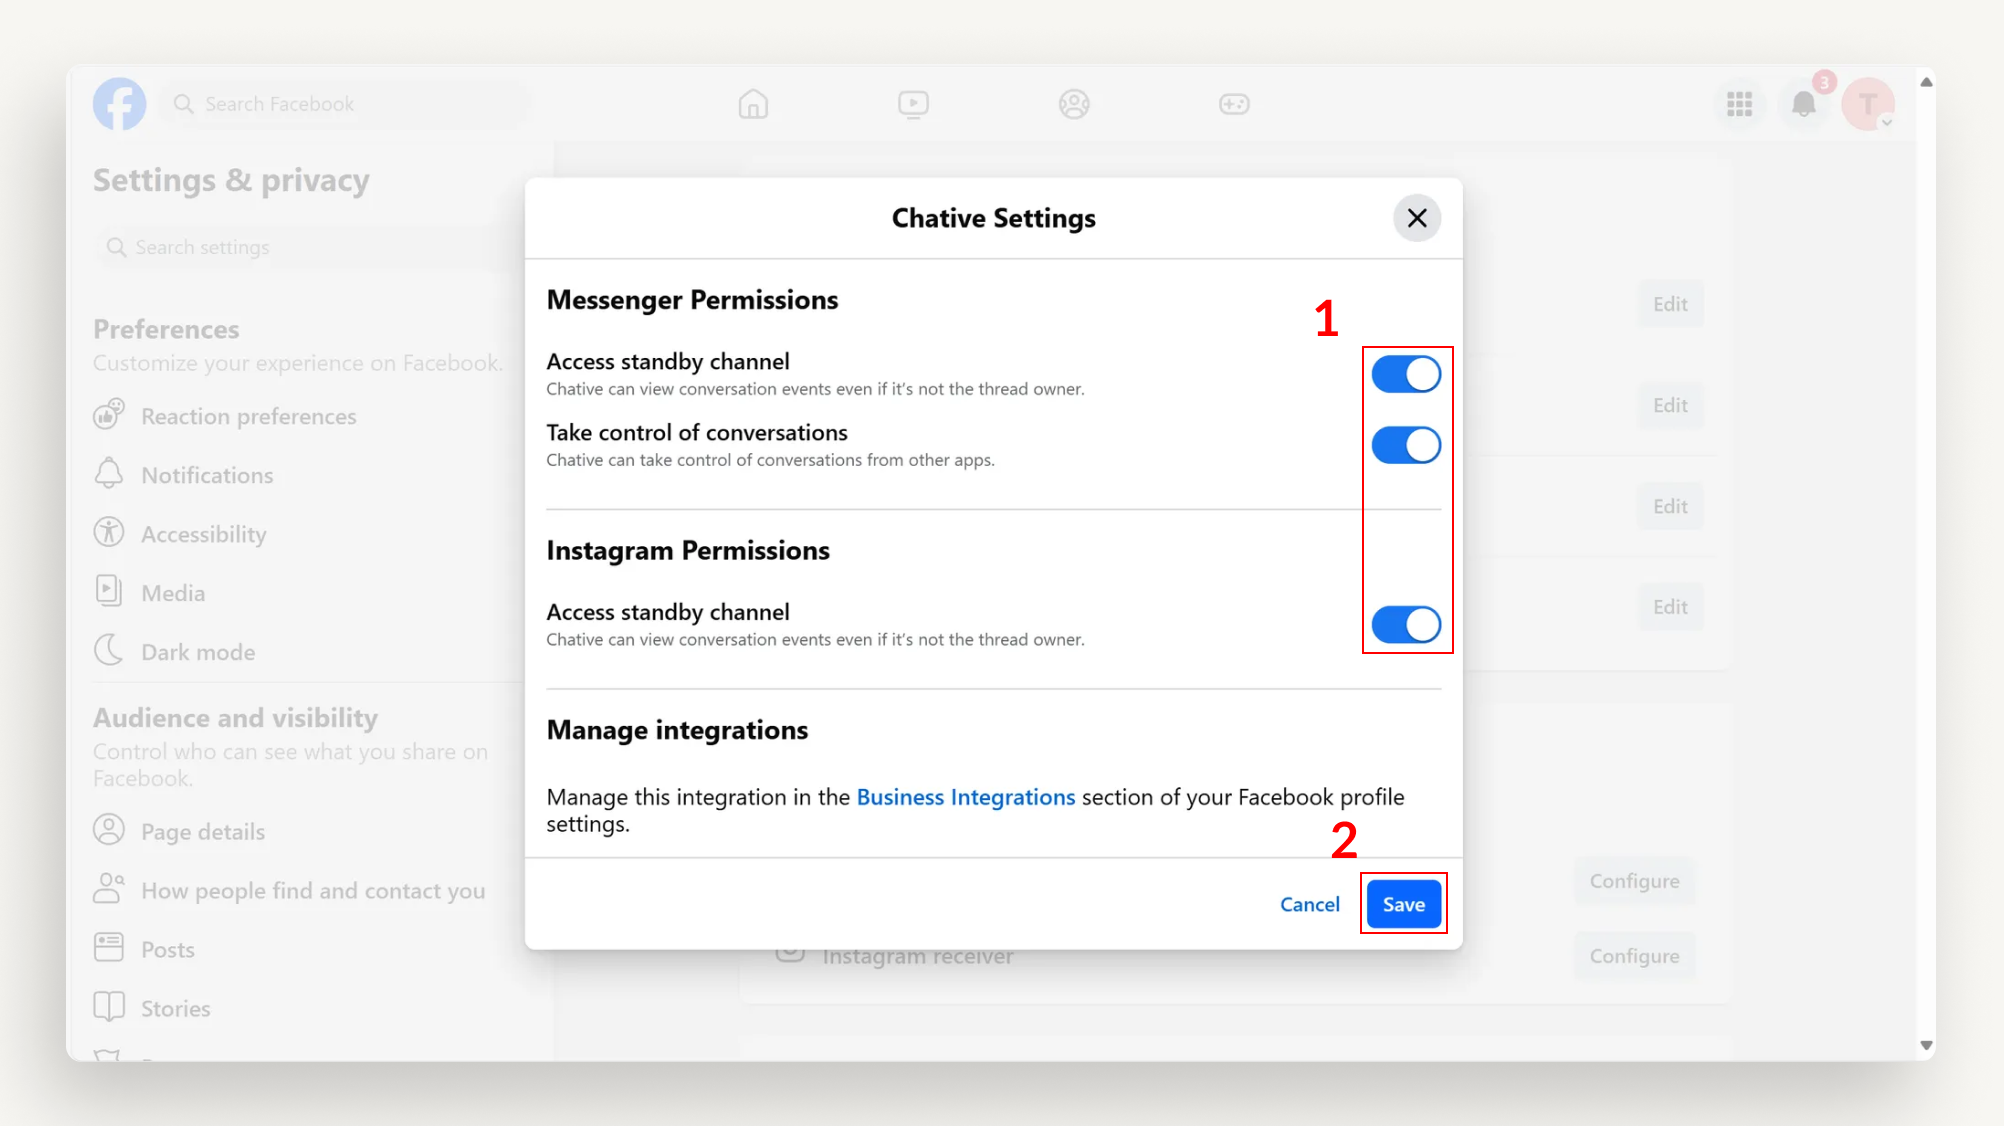
- Select Edit next to Chative > Ensure all permissions are enabled (as shown below) > Save.
- Go to your Facebook page > Settings and Privacy > Settings > Page Setup > Advanced Messaging.
Method 2:
Log in to your business portfolio on Meta Business Suite > Settings > Integrations > Conversations Routing > select the Facebook page you want to grant permissions > Partner apps.
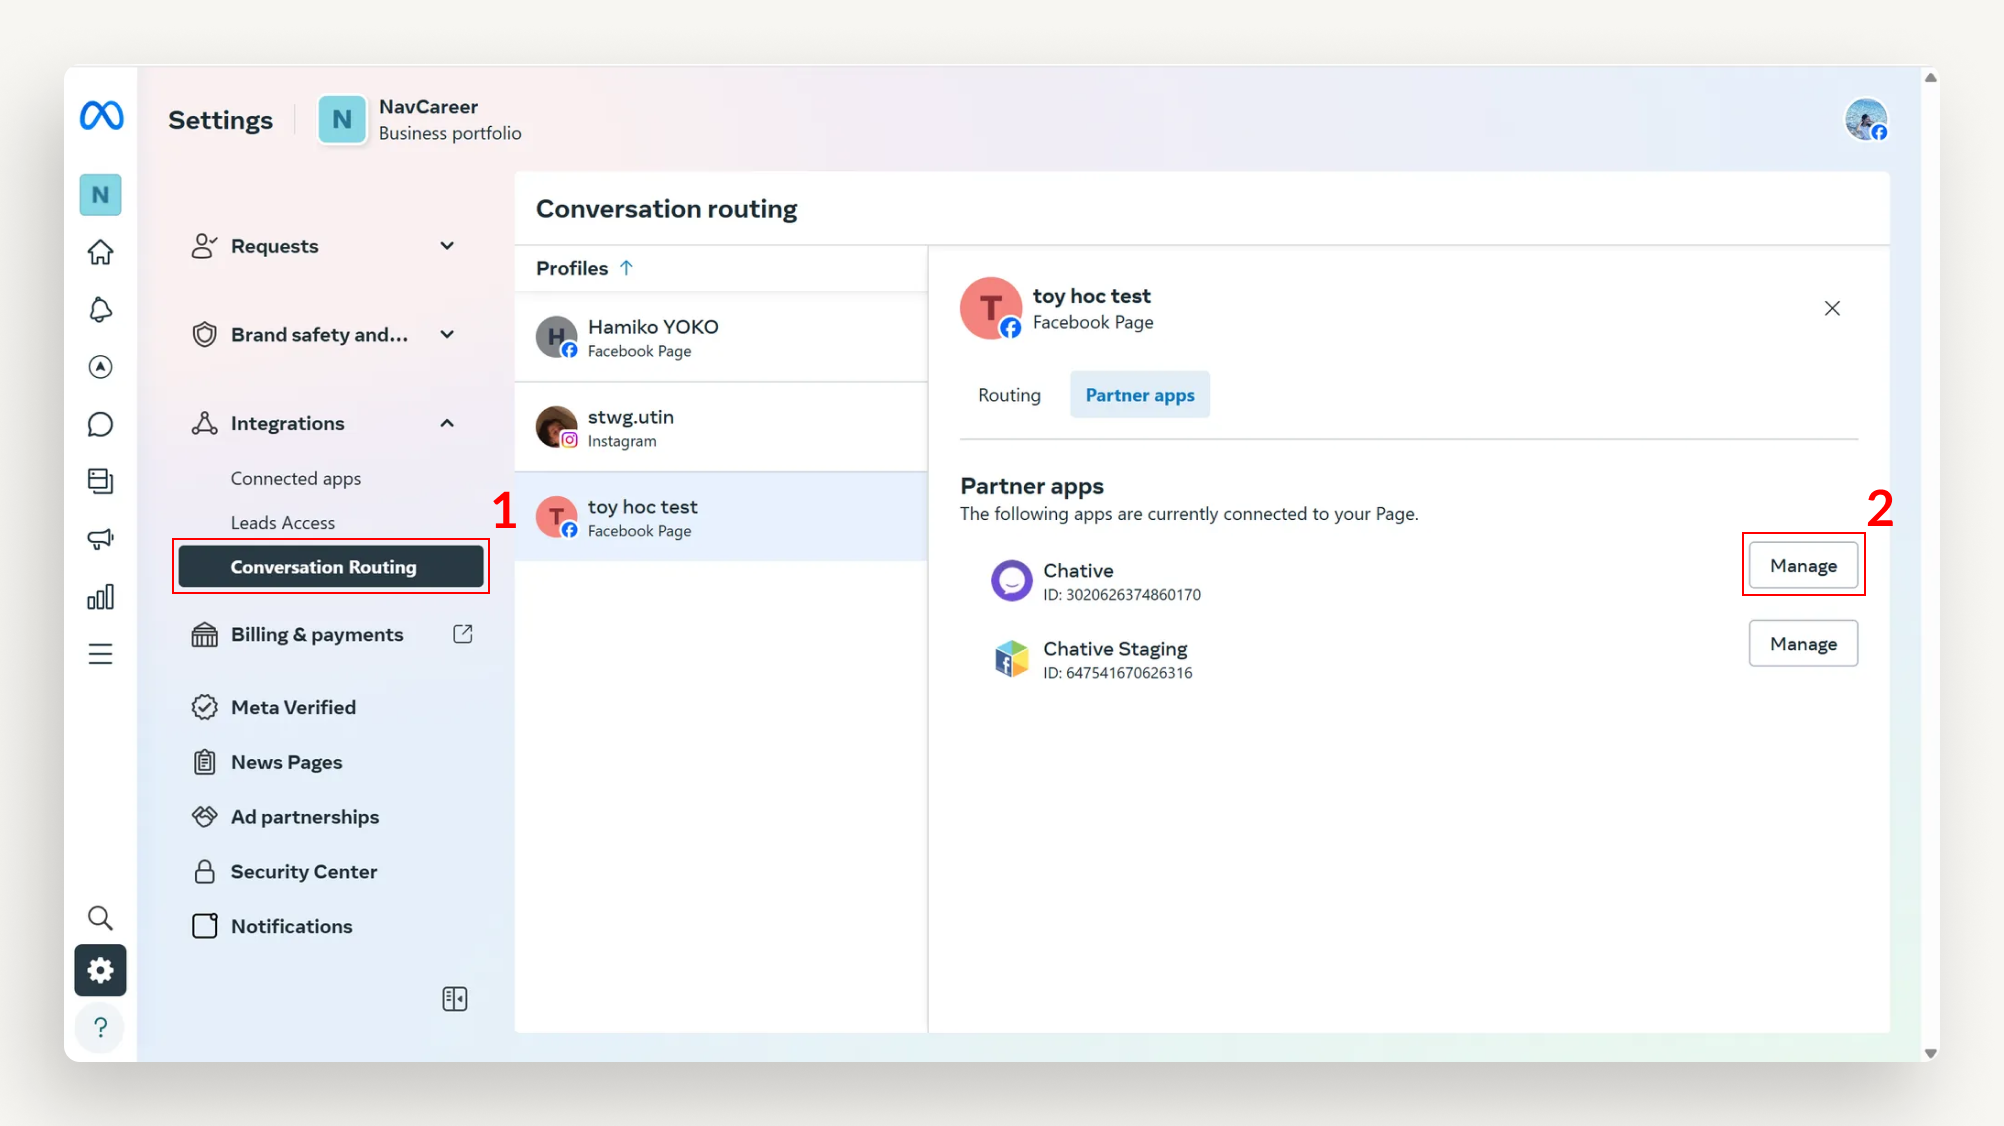
Select Manage next to Chative > Ensure all permissions are enabled (as shown below) > Save.

Why don’t I see the avatar and customer name when messaging via Messenger?
Common reasons include:
Chative's connection to Facebook has expired or become invalid.
Facebook automatically disconnects the API for security reasons.
The admin rights for the Facebook page have changed or there is an issue with connecting to Chative.
How to fix:
- Check your permissions on the Facebook page:
- Go to the Facebook Page.
- Navigate to Page Settings > Page Roles.
- Ensure you have Admin, Editor, or Moderator rights.
- Enable two-factor authentication (2FA) on your Facebook account:
- Go to Facebook Settings & Privacy.
- Select Settings > Security and Login.
- Enable Two-Factor Authentication following Facebook’s guide.
- Reconnect your Facebook page to Chative after completing the above steps.
Why does Facebook disconnect from Chative?
There are two main reasons:
1. Invalid access
The user (anyone in the Meta business server) has changed their Facebook password.
Facebook automatically changes the login session for security reasons.
The access token has expired or been revoked.
How to fix:
Log back into Chative using Facebook to restore access.
If it still doesn’t work, check the permissions for Chative on Facebook:
- Go to Facebook Settings & Privacy.
- Select Settings > Apps and Websites.
- Find Chative and ensure access permissions are still valid.
For more information on Facebook authorization, refer to this article.
2. Insufficient Admin rights on the Page
The user does not have Admin, Editor, or Moderator rights on the Facebook page.
The Facebook page requires Two-Factor Authentication (2FA), but the user’s account has not activated this feature.
How to fix:
Follow the steps in question Why don’t I see the avatar and customer name when messaging via Messenger?
After 24 hours, I cannot send messages to customers, how can I continue?
After 24 hours from the last customer interaction, to continue sending messages, you must comply with the policies of Facebook Messenger:
How to fix:
- Select the correct use case according to Facebook's policy, for example, delivery updates, appointment reminders, etc. If the wrong use case is selected, the message will be rejected.
- After selecting the appropriate use case, you can continue the conversation without interruption.