How to deploy Coze to websites
Imagine providing instant, 24/7 customer support on your websites, without increasing your support team's workload. By integrating your Coze bots with Chative.IO, you can do just that.
Here's what it can do for you:
- Answer common queries immediately, day or night.
- Handle multiple conversations at once without hiring more staff.
- Free up your human agents to focus on complex issues
This guide will show you how to deploy your Coze bots to websites.
What you need
Before connecting your Coze bots to Chative, make sure your bots are ready to interact and that Chative.IO can securely connect to both Coze and websites:
- Publish your bot in Coze
- Copy your Personal Access Token
- Log into your Chative.IO account and connect with your websites
💡 Keep your Personal Access Token confidential to maintain the security of your bots.
Connect Coze bot to Chative.IO
Log in to your Chative.IO account
Navigate to the Add-on section
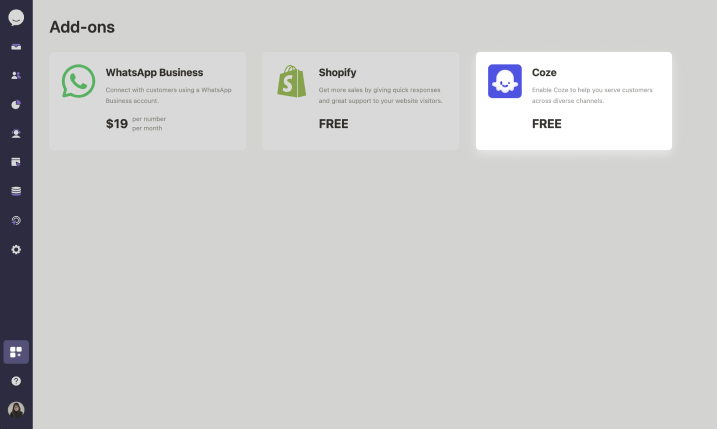
Select
Connect Coze bot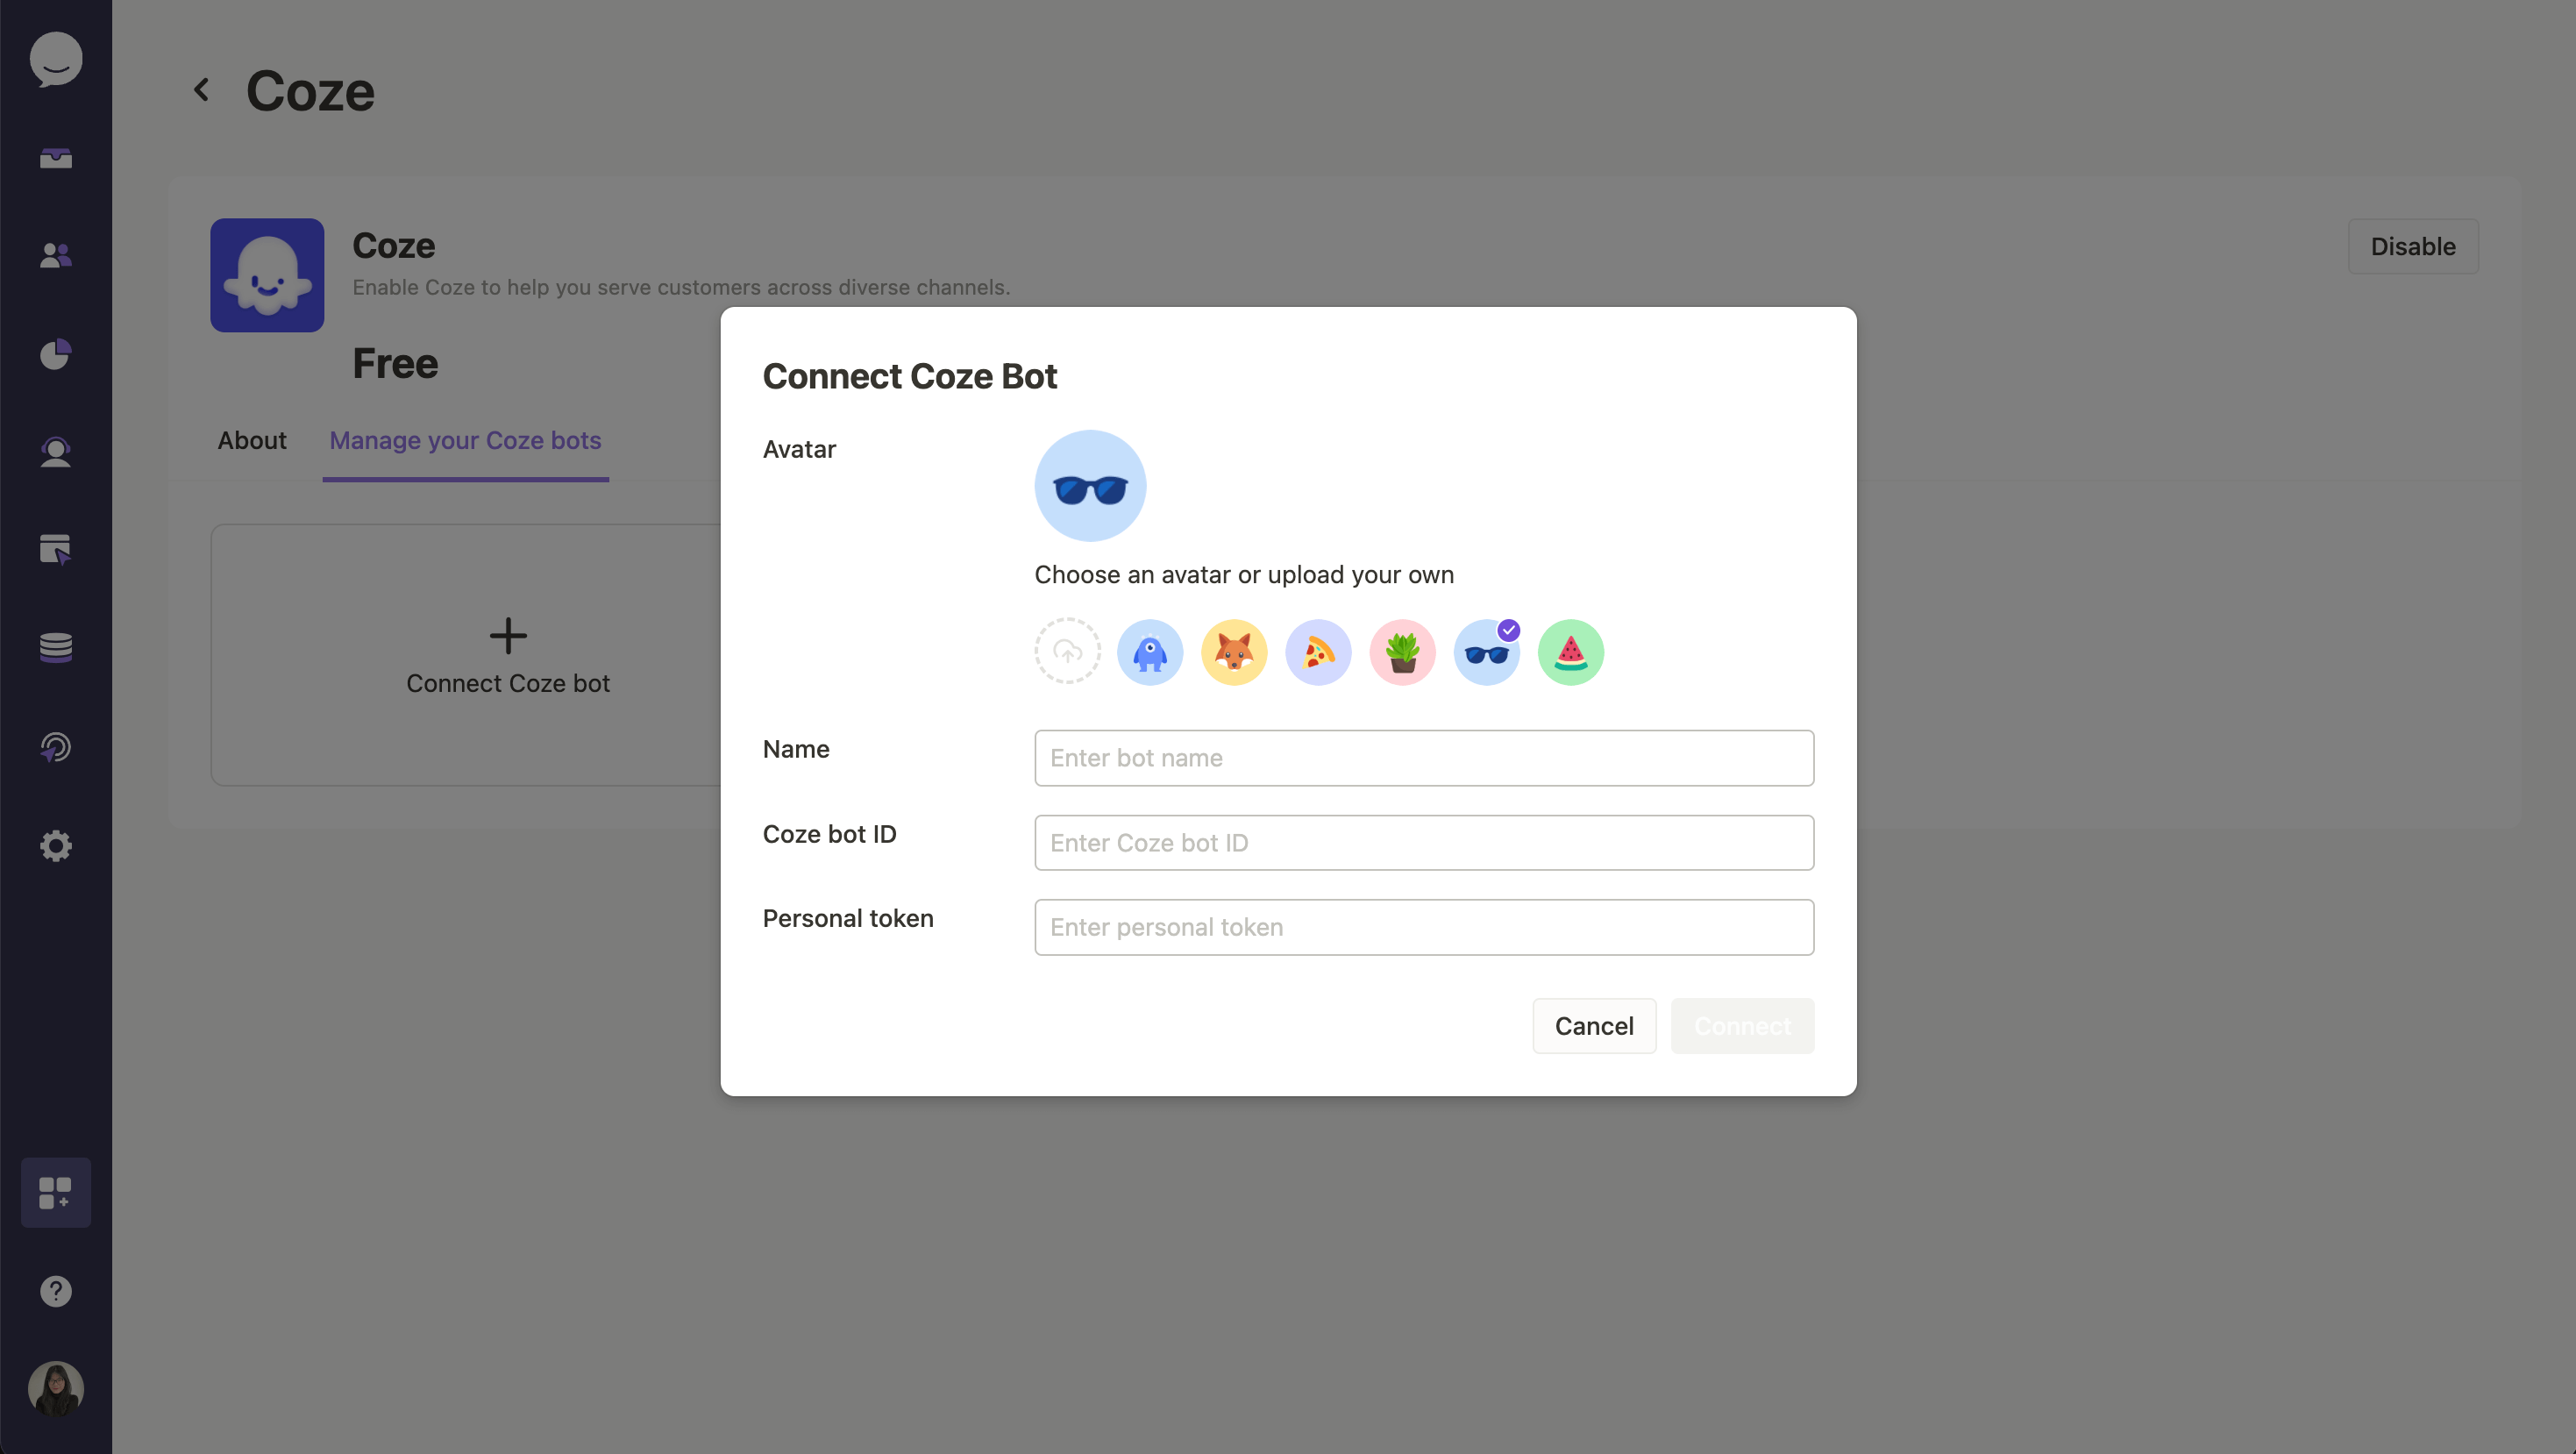
Enter the following information:
- Bot Name: Enter a name for your bot as it will appear in Chative.IO and your live chat widget on website.
- Bot ID: This is the unique identifier for your bot in Coze.
- Personal Access Token: Paste the token you copy earlier.
Click
Connect
If you encounter any issues during the connection process, double-check your Bot ID and Personal Access Token for accuracy.
Use Your Coze bot on websites
You have two options to make your Coze bots go live in Zalo OA:
Option 1: Assign manually
Option 2: Assign automatically (Highly recommended for efficiency)
Chative.IO powerful workflow allows you to automate bot routing to:
- Provides instant responses to all incoming messages
- Ensures 24/7 fast response time without manual work
1. Assign manually
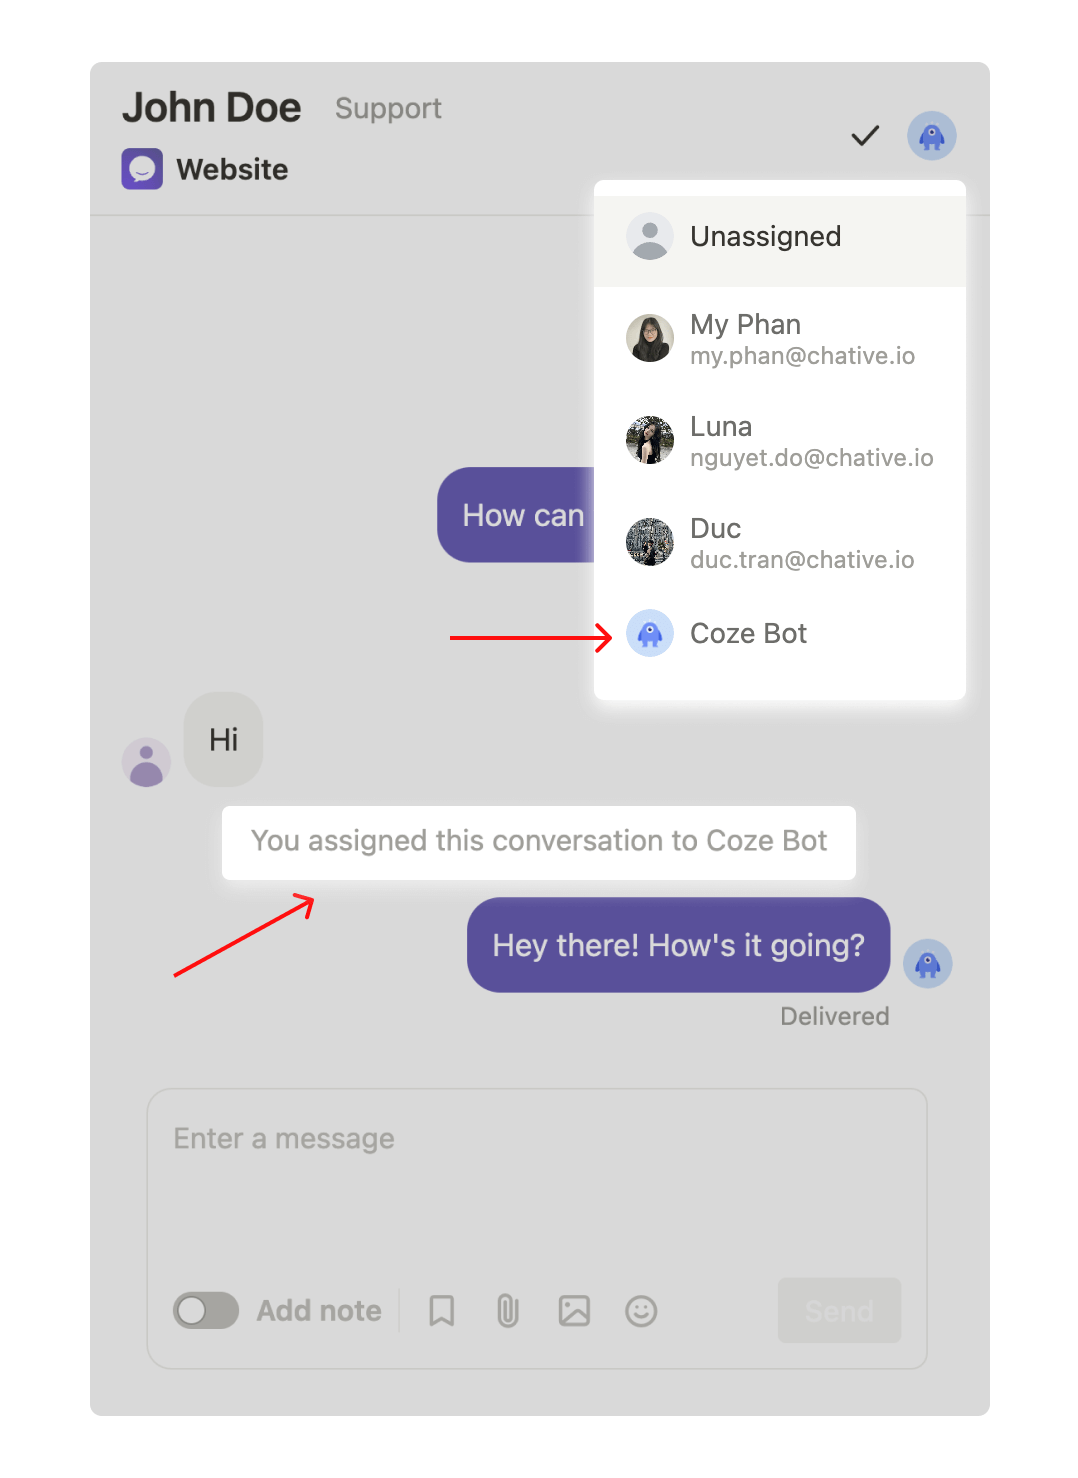
To manually assign the bot to specific conversations:
- Open the a conversation in your inbox
- Select the "Assign" option
- Choose your Coze bot from the list of available agents
2. Assign automatically (Highly recommended for efficiency)
Here's how to set it up:
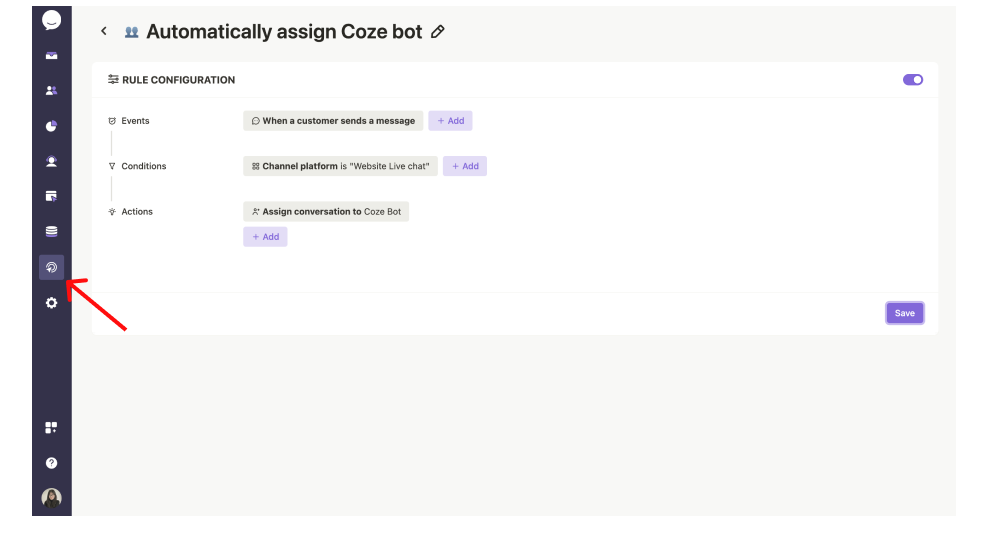
- Navigate to the Workflow section
- Click Blank template to create a new rule
- Set events for the rule:
- Choose "When a customer sends a message" to have the bot respond to all incoming messages.
- Set conditions for the rule:
- Select "Channel platform is 'Your Website Channel'" to apply this rule to Instagram conversations.
- Set action to assign bot to the conversation:
- Add an "Assign conversation to" action to the rule
- Select your Coze bot as the bot to be assigned
- Save and activate the rule.
By using Chative.IO workflow, you're not just assigning a bot – you're creating a smart, responsive system that enhances your entire customer service strategy on websites.
It's done! You can now test your Coze bots and see them in action on your websites.